
Backup Interface Menu
The 'Backup Interface' menu is the primary screen for you to monitor and adjust your backups. You can access this menu at any time by clicking the 'Backup Interface' tab in the top left corner of the screen. Below we see what the software typically will look like when it is idle.
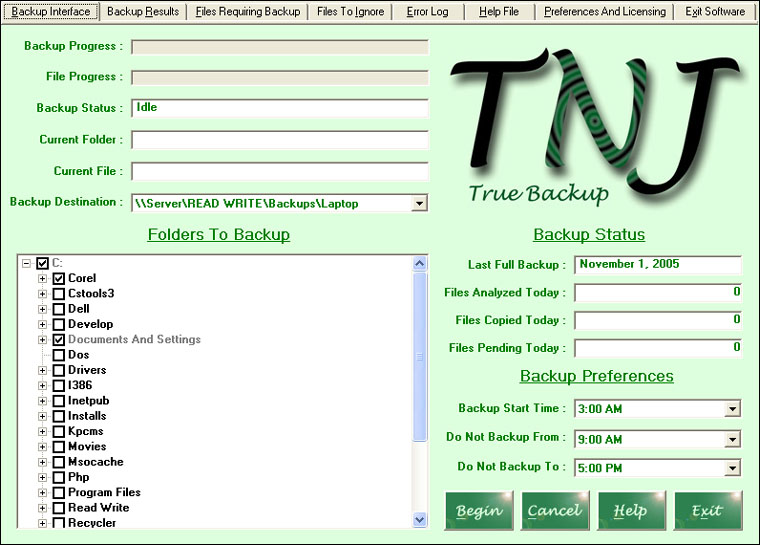
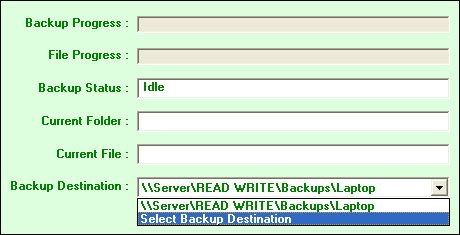
The top left portion of the screen gives you details about the current status of your backup and also allows you to select your backup destination. To modify your backup destination, simply click the down arrow on the right hand side of the dropdown list and choose 'Select Backup Destination', as seen below.
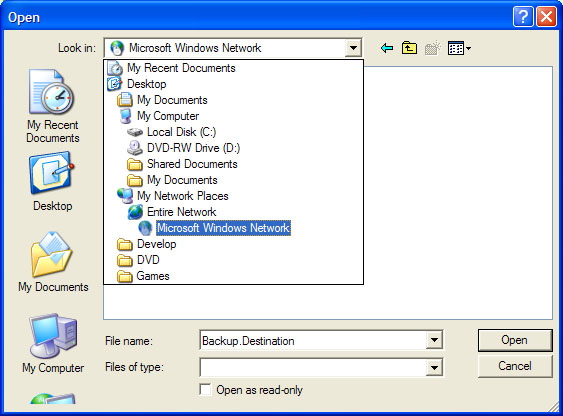
Choosing the 'Select Backup Destination' option will display a dialog box of your file system. Locate the appropriate destination folder for your backups and then click the 'Open' button to finalize your change. You can select another folder on your primary hard drive, another hard drive on your local computer, an external USB drive, another computer in your LAN or another computer in your WAN. Please review our tips for a sound backup policy guide for more details on where you should store your backups.
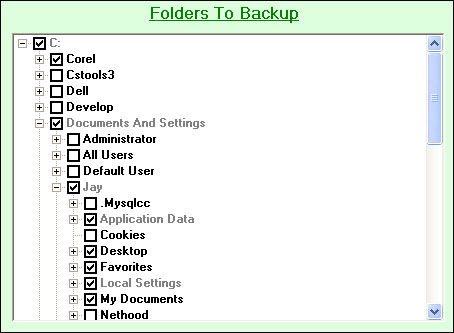
The bottom left portion of the screen displays your fixed drives and optionally, your non-fixed drives in an expandable tree format. This is where you select the folders that require a backup. Clicking the plus sign to the left of any folder will expand the list and display any folders beneath. Checking any folder will cause the software to backup the selected folder and any folders or files beneath it. A checked folder that is displayed in black text, indicates that the folder and everything beneath it will be backed up. A checked folder that is displayed in grey text, indicates that the folder is not backed up but that there are folders beneath it that are backed up. Looking at our example below we can see that the first entry in the list, 'C:', is greyed. This indicates that the entire C drive will not be backed up but that there are folders on the C drive that will be backed up. The second entry in the list, 'Corel', is displayed in black text. Therefore this folder and everything beneath it will be backed up.
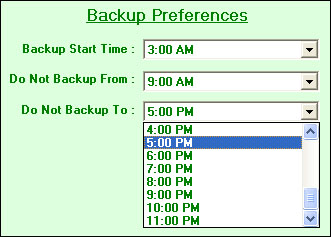
The bottom right portion of the screen allows you to select your preferences for when the software should perform backups and when it should not. The 'Backup Start Time' allows you to set the time for the backups to begin. Automatic backups will not occur before this time. By default this is set to midnight. The 'Do Not Backup From' and 'Do Not Backup To' options allow you to specify a block of time during the day when the software should remain idle. This can be used to prevent backups from occurring during your working hours for instance. In our example below, we have indicated that no backups should be performed between 9:00AM and 5:00PM.
Now that you have selected your backup destination, what folders you would like backed up and at what time, you can click the 'Save' button to save your changes. Your backups will begin automatically at the appropriate time or you can click the 'Begin' button to start the process immediately. The first part of the backup process is to analyze your current files. During this phase, the software compares your current files against your backup to determine which files should be copied. Files will be added to the 'Files Requiring Backup' menu if they are missing from the backup set, if the date stamps do not match, if the time stamps do not match, if the file sizes do not match or if the attributes of the files do not match. Note that in the image below, the 'Current Folder' is too large to be entirely displayed. Hovering your mouse over any field whose contents are too large to be fully displayed, displays a popup menu with the text in its entirety. This functionality is common throughout the software.
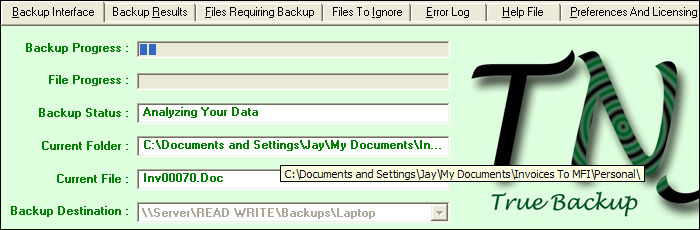
The second part of the backup process is to copy any files that were determined to be out of synch. The software attempts to gain exclusive control of each file before backing it up. This ensures file integrity by preventing other applications from modifying the file during the backup procedure. If control is gained, then the software will begin to backup the file. The backup progress and file progress bars give you an indication of how long the backup will take. You can interrupt this process at any time by clicking the 'Cancel' button. If the file is successfully copied, then the file is removed from list and the software moves to the next file. Any files that can not be copied will remain in the backup queue. The software will continue to monitor these files throughout the day and back them up at the first opportunity.

The 'Backup Status' section gives you a quick summary of the backup progress for today. The 'Last Full Backup' displays the last date that all selected folders were successfully backed up. The 'Files Analyzed Today' field is the total number of files that have been examined today. The 'Files Copied Today' field is the total number of files that have been successfully backed up today. The 'Files Pending Today' field is the total number of files that still require a backup today. For more details, try clicking the 'Backup Results' tab.

![]()
Copyright 2005 TNJ Computer Associates